Designing the Bottle, Collar and Reed Pack as One System
You pick a bottle for its shelf appeal, add a collar because it looks finished, and drop in a standard bundle of reeds — then discover the diffuser throws too hard and empties in three weeks, or too soft and never fills the room. The proble
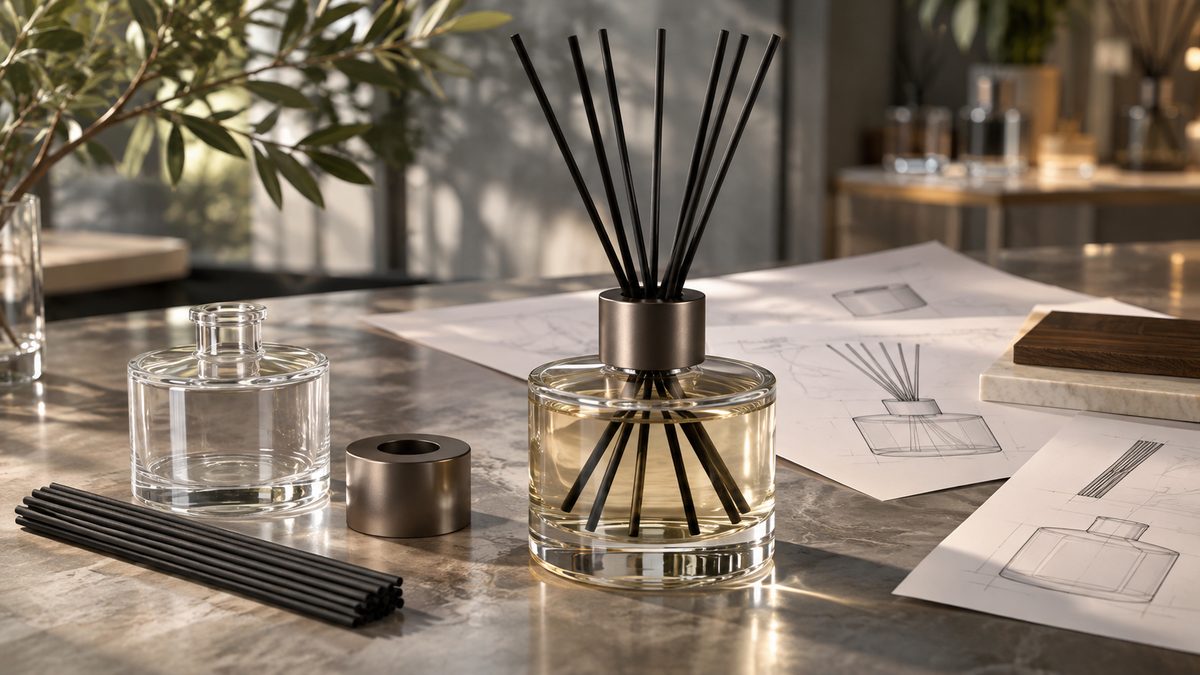
You pick a bottle for its shelf appeal, add a collar because it looks finished, and drop in a standard bundle of reeds — then discover the diffuser throws too hard and empties in three weeks, or too soft and never fills the room. The problem is that the bottle, collar and reeds were chosen one at a time, and a reed diffuser only performs when the three are designed as a single system.
This article explains how the bottle neck, the collar opening and the reed dimensions interact to set evaporation rate, scent strength and stability. It gives you the design relationships to check and a specification sequence that keeps the look you want without breaking the performance the customer expects.
Table of Contents
- Why the three parts must be designed together
- Bottle neck and evaporation surface
- What the collar actually does
- Reed length, count and stickout
- Stability and centre of gravity
- Fill volume versus headspace
- Practical guide: spec'ing a diffuser as one system
- Frequently asked questions
- Conclusion
Why the three parts must be designed together
The bottle holds the liquid, the collar narrows the opening through which the reeds pass, and the reeds expose evaporation surface to the air. Changing any one of them moves the evaporation rate, so a design that treats the bottle as decoration and the reeds as a standard accessory is guessing.
One number connects them all
The system is governed by exposed surface area and the height the liquid must climb. The neck and collar set the area, the reed length sets the climb, and together they decide how much fragrance leaves the bottle each day.
Bottle neck and evaporation surface
The bottle's neck diameter bounds how many reeds you can fit and how much open area surrounds them. A wide mouth with few reeds leaves a ring of exposed liquid that evaporates directly and unpredictably, while a neck that crowds the reeds chokes the airflow that carries scent away.
The neck is a constraint, not a style choice
Choose the neck after you know the target evaporation rate, because it caps the reed count and the air gap. A visually generous opening can be a performance liability if it lets the base evaporate around the reeds instead of through them.
What the collar actually does
The collar is often treated as trim, but its real job is to seal the bottle mouth down to the reeds and to hold the reeds upright and evenly spaced. It reduces the open surface to just the reed cross-sections, which is what makes the evaporation rate steady and predictable.
A close-fitting collar steadies the release
A collar that grips the reeds and closes the remaining gap stops the liquid from evaporating around the reeds and keeps them from fanning out. A loose collar does neither, and the result is an uncontrolled, fast release followed by a weak tail.
The choke point sets the rate
Where the reeds pass through the collar, the available cross-section becomes the metering choke of the whole system. Narrowing that passage reduces output, widening it increases output, and this single dimension is often a cheaper control than reformulating the base.
Reed length, count and stickout
The reeds convert liquid into scent at the exposed portion above the collar. Their length sets how far the liquid must climb, their number sets the total evaporation surface, and the stickout — how much reed stands proud of the bottle — sets how much scent reaches the room.
Stickout is the visible lever
More stickout means more exposed reed surface and stronger throw, but also faster consumption. The reeds should also be long enough to reach near the bottom of the bottle so the liquid is used, rather than stranding a reservoir that never wicks.
Stability and centre of gravity
A diffuser full of liquid with tall reeds is top-heavy and easy to knock over, and a spill is a far worse failure than a weak scent. The bottle's base diameter and the mass of the liquid must balance the height of the reeds.
Design the bottle to survive a knock
A wide, heavy base lowers the centre of gravity and keeps the unit upright on a shelf or a side table. If the look demands a tall, narrow bottle, compensate with a heavier base or shorter reeds and test it in the worst realistic position.
| Design goal | Controlling part | Failure when ignored |
|---|---|---|
| Steady release rate | Collar opening | Fast burn then weak tail |
| Full liquid use | Reed length | Stranded reservoir |
| Upright stability | Base width and weight | Knock-over spill |
Fill volume versus headspace
The amount of liquid in the bottle and the air left above it matter more than most buyers realise. Too little headspace leaves no room for the reeds to displace liquid when inserted, and the bottle overflows; too much headspace wastes fill and shortens the visible life.
| Dimension | What it controls | Typical direction |
|---|---|---|
| Neck diameter | Reed count and air gap | Match to target reed bundle |
| Collar opening | Metering choke | Close around the reeds |
| Reed stickout | Throw strength | More stickout, stronger throw |
| Base diameter | Stability | Wider for taller reeds |
Practical guide: spec'ing a diffuser as one system
Step 1 — Set the target evaporation rate
Decide how long the diffuser should last and how strong it should smell, and write that as a grams-per-week target before you pick any component.
Step 2 — Size the neck to the reeds
Choose a neck diameter that fits the intended reed count with a small, controlled air gap, so the base evaporates through the reeds rather than around them.
Step 3 — Close the collar around the reeds
Select a collar that grips the reeds and seals the remaining mouth, using the collar opening as your metering control for fine-tuning the release.
Step 4 — Set reed length and count
Pick a reed length that reaches near the bottle bottom and a stickout that delivers the target throw, then confirm both by weighing the filled unit over time.
Step 5 — Balance the bottle
Check the centre of gravity with a full fill and the reeds in place, and widen the base or shorten the reeds if the unit tips too easily.
Step 6 — Test in real conditions
Run the assembled system in a typical room, not just in the lab, and measure both mass loss and perceived throw across the intended life.
Step 7 — Document the bill of materials
Lock the neck, collar, reed and fill specifications into the BOM so the next production run reproduces the system you tested, not an approximation of it.
Frequently asked questions
What is a reed diffuser collar?
A collar is the fitting that sits in or on the bottle neck and holds the reeds while closing the gap around them. It turns an open bottle into a controlled metering system and keeps the reeds upright and spaced.
What is reed stickout?
Stickout is the length of reed exposed above the bottle and collar. It sets how much evaporation surface is in the air, so more stickout means stronger throw and faster consumption.
What is headspace in a diffuser bottle?
Headspace is the air left above the liquid in a filled bottle. It must be large enough to accept the displacement when reeds are inserted, but not so large that the fill looks short.
How does neck diameter affect throw?
A wider neck allows more reeds and a larger air gap, which can raise throw, but a gap that lets the base evaporate directly makes the release fast and uncontrolled. The neck should be sized to the reed bundle, not opened up for looks.
Why does a collar reduce evaporation?
The collar closes the open mouth down to the reed cross-sections, so the only evaporation path is through the reeds. That slows and steadies the release and stops the base escaping around the bundle.
How many reeds should I use?
The right count follows the bottle neck, the target throw and the intended life. More reeds raise output and shorten life, so choose the number that matches your evaporation target and test it, rather than defaulting to a standard bundle.
How do I stop the bottle tipping over?
Lower the centre of gravity with a wider or heavier base, or shorten the reeds. A full diffuser with tall reeds is top-heavy, so stability must be designed in, not added after the fact.
Should reeds be longer than the bottle?
They should be long enough that the tips sit above the collar for throw while the lower ends reach near the bottom so the liquid is fully used. The exact stickout depends on the throw and life you want.
Conclusion
A reed diffuser works as a chain of three parts, and the only way to hit a target throw and lifespan is to design the neck, collar and reeds against each other from the start. The collar is the metering point, the stickout is the throw lever, and the base is the safeguard against the spill that ends the product's life early.
Lock the whole system into the bill of materials after testing it assembled in a real room. For the evaporation and loss checks that validate the design, read our guide on reed diffuser mass loss and leak checks, and for the retail-facing side see planning starter packs and reed bundles. Review our packaging options or ask about custom diffuser design.
Discuss your fragrance programme with our team:
WhatsApp: +86 17324762943
Email: adon@customperfumeoem.com
Website: customperfumeoem.com